I know you’ve all been eagerly awaiting the second part of this post.  I am happy to be able to satisfy your curiosity by concluding the epic story of how to turn plywood into rustic flooring!  Now, after all this time you’ll learn how to turn this…

rustic

Into this…!

floor1

As you might recall, I left you all with half of my floor glued & nailed down.  What I expected to be a lightning fast completion of the In Law unit floor, turned into a bit more of a task then I had planned for.  With that said, as with most of my In Law unit projects, I have a lot of information to share you.  This time, however, I’d like to take you on a journey.  Let’s begin this story…

IN A LAND FAR FAR…

…from Los Angeles, known as San Francisco…

Once upon a time, a powerful, wise and noble maiden worked tirelessly to renovate her castle.  She was working hard to install a new floor without having to sell her best milking cow just to afford the materials.  She finally completed the installation of the floor, with the help of her magical wand nail gun, and her trusty forest creatures glue applicator.

floor2

Once the floor was installed it was time to apply the stain.  After testing out about 15 different colors the maiden called her creature friends with an announcement.  “Hark dear friends, a decision has been made.  From henceforth, the color of this floor will be known as Honey Maple.”  Not wanting to get into the details of what led her to this color, the maiden simply explained that she chose the Zar brand of stain because Minwax and Varathane simply didn’t embody the beautiful hues of nature.

After applying the stain by hand everything was looking just as the stain’s name suggested, like someone had poured honey and maple syrup over the floor, leaving it with a beautiful golden gleam.

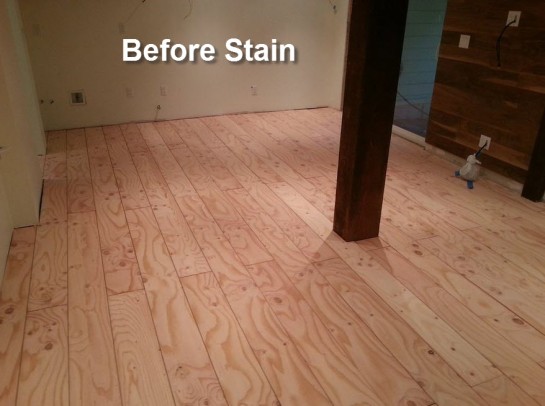
Even for a hardworking maiden in a castle far far away, the application process of stain was what you might expect.  Dunk one rag into the stain and spread it around liberally.  Then with a dry rag, wipe off all of the excess.  Here’s the end result:

beforestain

Afterstain

Things looked so good that the following day the maiden decided to seal in the blemish free wood with a coat of Polyurethane, locking in its youth for all time.  She decided to use a water based Polyurethane because it dries so quickly, and because the creatures of the forest (i.e.: her dog & cat) could be impacted by the toxic fumes of an oil-based Polyurethane.

The maiden poured a strip of the Polyurethane (roughly 1” x 24”) directly over her Honey Maple floor and spread it out evenly by pushing and pulling with a microfiber applicator.

applicator

Finally, the floor was covered in the fresh shine of magical protective sealer.

shiney

Overnight, however, an evil sorceress entered the In Law unit.  Threatened by the beauty and glimmer of the floor, she wielded her magical broom and soaked up the stain so that there were huge spots where it didn’t even look as if stain was applied.  Cackling with satisfaction, she then covered over her handiwork with the polyurethane and fled to torment another unsuspecting DIY’er.

witch

The next morning, the maiden headed down to her In Law unit, whistling a happy tune, when she stopped, stunned and terrified by the sight before her!  SPLOTCHES! Everywhere!

splotches

She had no idea how this had happened but suspected that evil was afoot.  What else could explain…this!?

splotch

The maiden, being more powerful than the cackling witch had assumed, pulled up her Cartharts and went right to Google.  She typed and clicked and read and watched until the answer came to her.  “Softwood” the Google machine whispered to her…blame softwood.

The Google machine went on to explain “oh powerful maiden, while you may be strong, your plywood is soft.  It is made of Pine, which has inconsistent pores.  Some pores are open and some are not, so some stain will soak in and some will not.  Had you consulted me before applying the stain you would have known that applying a wood conditioner or Tung oil before applying the stain might have solve the problem.  Alas, with your hard body comes a hard head, and this is how your lesson will be learned.”

After promptly slamming closed her laptop, cursing the Google machine and its all knowingness, the maiden went back to work.

In her rush to fix the problem bestowed upon her by the evil sorceress, the maiden rented a floor buffer to try and take the layer of Polyurethane off.  Unfortunately for her, the floor buffer was possessed and merrily threw her around the room like a doll.

While she did get free dancing lessons from the possessed beast, the polyurethane remained in place.  The maiden then went to her trusty palm sander.  After sanding her way through the protective layer, she applied around 4 more coats of stain over the many unstained spots. The reason for the extra coats was because the stain just didn’t want to soak into those spots.  Whatever evil magic that prevented the stain from sticking before, was still an issue when trying to reapply.

Finally, after the final application of stain, the maiden’s floor had been evened out.  After a solid vacuuming, then using a tack cloth to get up the remaining dust, she returned to applying Polyurethane.  This time, when the sealer dried the floor had the sparkle of honey, just as she had wanted.  Rather than bringing back the possessed buffer, she decided to use a pole sander and 180 grit sand paper to get rid of the bumps between layers of Poly.

pole sander

Finally, 3 coats of Polyurethane later, the powerful maiden was able to call her new floor complete!

finished1


Finished3


finished2

She never saw that evil witch again, but she knew she was out there…waiting…

Hi Everyone!  You may be wondering what I’ve been up since my last post.  Now that the bathroom is nearly done, I’ve returned to the main living space of the In Law unit.  Before I can install the kitchen and the crown/floor moldings I need to install the floor.

floro2


Now don’t get too excited, the floor isn’t quite done, but it is well on its way.  Since this process has been a long one, I’m splitting the flooring posts into two phases.  Now you might be asking “Beth, what’s taking so long for you to install flooring?  Don’t you just snap it together?”

Well, blog reader, as usual, that’s an excellent question!  You see, I like to think of flooring as the shoes of the house.  When you walk up to someone who’s dressed to the 9’s, you might give them a good once over.  You might look at their hair first and say, “nice style!”  Then make your way down to their face and say “hey, that eye shadow makes your eyes POP!”  Then you’d move down to their outfit…”that dress is really flattering.”  Then, finally, the shoes!  “Oh damn!  Look at those digs!” That’s how I think of the floor.  You walk into a house and you might think “nice paint” or “I love the exposed beams” but when you get to the flooring I want you to say “Wow!  That flooring must have cost a fortune!”

shoes

Now, with that said, I do not want to spend a fortune on flooring.  In fact, I want to do the opposite.  Unfortunately, real hardwood flooring can be upwards of $6 a square foot, which could cost me over $2000. Since my budget was closer to the $400 range, I had to get creative.  Finally, it came to me!  Forget about hardwood, engineered or laminate flooring.  Forget about tile and carpet (there’s nothing rustic about carpet…or if there is I don’t want to go near it).  Instead, picture it…plywood.

**insert cricket sounds**

That’s right people, we’re going to use plywood!  I know what you’re thinking…  “Plywood?  Really?  You’re just going to nail sheets of splintery, rough, knotty wood to the floor?”  No, my loyal reader…of course not!  Would you expect me to get dressed up in my finest threads and then wear, well, something like this?

uglyshoes

Of course you wouldn’t.  Here…let me take you on a flooring journey.  Just follow me…


Step 1:  Buy Some Plywood

First, I went to Lowes and purchase around 14 sheets of 4’x8’ knotty pine plywood.  We’re talking about their low-cost plywood, not their fancy maple plywood.

(Tip:  If you’re going to try this for yourself, really examine each sheet to make sure it doesn’t have ugly cracks or plywood glue showing.)


 Step 2:  Cut Plywood Into 8″ Strips

Once I had all of my sheets ready to go, I paid Lowes to cut them into 8” strips.  By cutting them into 8″ strips, I’m able to get a nice even number of strips from each sheet, thus reducing waste.

(4′ sheets / 8″ strips = 6 strips per sheet)

While I do have a table saw at home, trying to cut the sheets into even strips would have been very difficult.  Also, it only cost $.15 per cut, leaving me with a cost of around $15 for everything.

cutting

strips


Step 3:  Sand Away The Splinters

Now that all of my plywood has been cut into strips, it’s time to go home and begin sanding…and sanding…and sanding!  While the lower grade plywood is cheap and rustic looking, it also has a ton of splinters. Since I don’t want my guests to get splinters in their feet, I tried to sand all of the pokey bits completely smooth.


floor1

Step 4:  Mark the First Row of Flooring

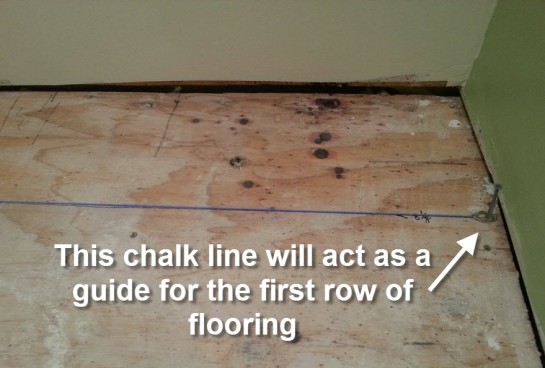
Finally, after many (MANY) weekends of sanding, I have officially gotten through ALL of the plywood strips.  Now it is time to start laying the flooring.  Since I’m going for that rustic, barn wood look, I am simply going to glue and then face nail the strips of plywood to the floor.  I begin by marking the position of the first row of flooring.  This is really important, otherwise by the time you get to the other side of the room your flooring could be crooked.

chalk


Step 5:  Glue & Nail

Once the line is marked I began to install the flooring.  I first put a generous amount of heavy-duty construction adhesive on the back of the plywood.  I then put it down in position and used my finishing nailer with 16 gauge nails to shoot 3 nails into the board every 6 inches.

glue


Step 6:  Space Flooring Properly

In order to properly space the boards I used my L-Square, which was the perfect width for me to use to separate the flooring strips.

L-Square


space

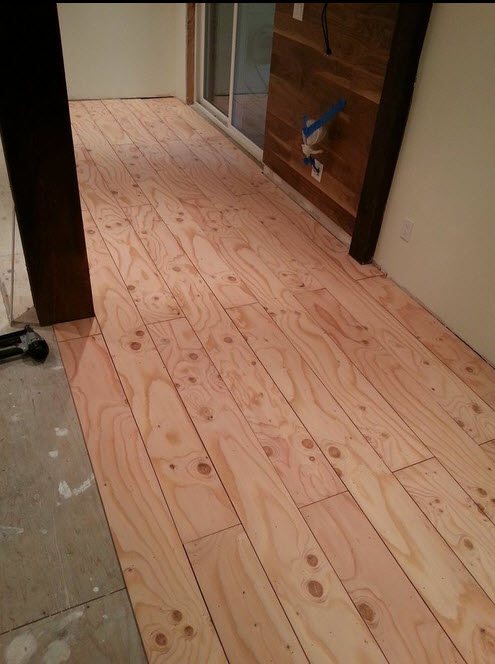
Now, continue to do that until the floor is finished.

firstrow


Halfway2


Halfway1

I’m half way there!  My next post will cover the second half of the flooring, along with staining and sealing.  Stay Tuned!


Last time I posted I showed you the brand new tile surrounding the bathroom tub!

Let’s take another look…

broom

It makes me smile every time I see it!

Of course, while everything is coming together, this puzzle has a few more pieces.  Take for instance the floor.

One major lesson I learned while tiling the tub surround was that the smaller the tile, the longer and more tedious the project is going to be.  With this newfound knowledge at my finger tips, I decided to go the opposite direction with the floor tile.  No more pocket-sized tile.  This time, I went unwieldy, heavy and long!

floor1

There are benefits and drawbacks to each type of tile.  Subway tile is easy to maneuver, can be held in one hand and takes about 30 seconds to cut.  With that said, there were about 1000 cuts that needed to be made, and each subway tile needed to be level (which took a tremendous amount of precision and focus)

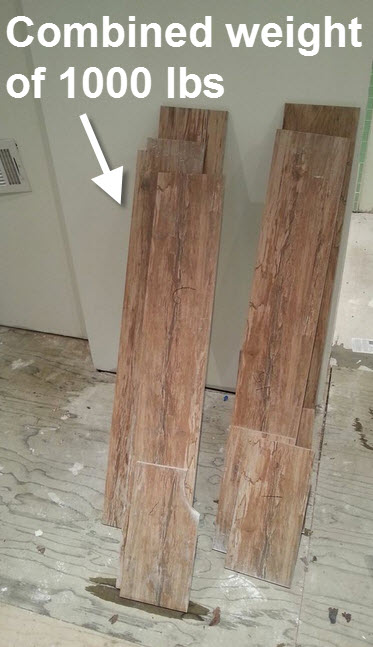
In the case of the floor tile, it was seriously heavy and unwieldy, but on the plus side I only had to make a few cuts.  This was particularly good given that I needed to  maneuver these monoliths through the Easy Bake Oven of wet saws.  For those of you unfamiliar with the magic of baking deserts under a lightbulb, let me illuminate you on the wonder that is the Easy Bake Oven…

Easy Bake Oven


Now, imagine feeding a one ton piece of tile that is as long as a small tree into that flimsy plastic contraption and you’ll understand the risk I was taking.

easybake

I pre-cut all of the planks of floor tile so I could lay them all down in fell one swoop.  I also ‘dry fit’ the tile prior to mixing the mortar to make sure everything fit together well.

The process of laying the floor tile was essentially the same as the wall tile, but I didn’t need to constantly check that the tiles were level.  Everything ended up going down really quickly.

grout

throan room

Once the mortar dried it was time for the grout.  Just as I did with the wall of tile, I saved some of the wet grout to do some touching up after the first layer dried (about 20 minutes later).

grout


floorfinished


Now, you might think that this was enough for one blog post, but no!  After all, what is a throne room without a throne?  While new tile is great and all, the truly under appreciated star of the bathroom is the toilet.

Once the floor tile was ready to be trampled all over, I wasted no time having my plumber come out and finish installing the shower head, nozzle, drain, and yes…the toilet.

toilet


nossle


tub1

The bathroom is almost done.  I still need a vanity and a shower door (along with a bit of molding), but now its time to shift my focus back into the main room.  Stay tuned for my upcoming post on flooring!

While I would like to throw out excuses as to why you haven’t seen a post from me lately (perhaps the recent debut of the Game of Thrones or the cunning way my dog dictates my ‘play’ schedule), but the reality is that putting up tile takes a long time!

I mean, sure, you can slap up some mortar and stick some tiles to the wall in no time, but what you’re left with would cause anyone with even moderate OCD to fly into a fit of rage.

badtile

As someone who appreciates clean and level lines, I decided that I would take my time putting the tile up the “right way.”  Now, you might be asking “Beth, what IS the right way to put up tile?”  Well, blog reader, as someone who has just completed her first tile job, I’m a wealth of information.  Okay, perhaps I’m more like a coin jar of information.  Regardless, here’s what I learned:


 Step 1:  Waterproof your tub surround

Awhile back I had a “tile guy” come out and install a mortar bed around the tub.  The reasoning for this was twofold.

 Reason #1:  None of the walls around the tub were square or plumb.  If I were to just slap up some concrete board and install the tile, the crooked lines would have caused immediate and unstoppable twitching that would have eventually provoked  the beast within to emerge and completely destroy the bathroom.  Clearly, this would have been counterproductive & put my work behind schedule.  A mortar bed is essentially putting a concrete like substance up on the wall and then molding those walls until they are square and plumb.

 Reason #2:  The mortar bed is completely waterproof!  No need for any additional liner, waterproof membrane or anything else.

Now that we have our bathtub surround waterproofed and square, it’s time to get down to business!


rightangle

Step 2:  Select Your Tile:

One of the reasons this tile job took me around a month to complete was because I selected subway tile.  The smaller the tile, the more time it takes to ensure everything is level, and the more cuts you need to make.  For those of you considering doing some tiling, but are working on a tight timeline, I do not recommend working with subway tile (although it is beautiful!)

We decided to go with a sea-foam green glass subway tile.  The glass is slightly rippled, making it look refreshing and wet (two adjectives that seem at home when describing a bathroom)

tile1

tile2


Step 3:  Get your Materials:

For this job I got the following items:

  1.  Tile
  2. Mortar specifically for glass tile
  3. Polymer additive for mortar (this makes it a little extra water proof)
  4. Tile Spacers
  5. Notched Trowel
  6. Grout Float
  7. Sponge
  8. Level
  9. Bucket for mixing
  10. Tile Cutting saw.  (I decided to buy a cheap $80 saw rather than rent one for $50 a day.  It was an excellent purchase and I highly recommend others do the same.  At $50/day to rent, by the time you’re done you could have bought a fancy tile cutting saw.  I got the Skil 7″ Wet Tile Saw at Lowes.     It is the Easy Bake Oven of tile saws, but it worked great for my needs.

skilsaw


Step 4:  Planning

The most important row of tile you’ll lay is the first one.  That first row needs to be perfectly level in order for the rest of the wall to follow in its footsteps.  If your first line of tile is off level by even a fraction of an inch, by the time you get to the top of the wall you could be off by inches.

I started my planning by marking the center of the walls (vertically and horizontally) with level lines as guides.


guidelines


marks


Step 5:  Mix It Up!

Okay, I have everything I need, and now it’s time for tiling.  Much like working with concrete, I had to get the mortar all mixed up:

mix


Step 6:  Start Tiling!

I begin by placing my first tile directly to the left of the center line.

centerline

The idea behind working off the vertical center line is that by the time you get to the end of the line, you’ll be left with a ½ a tile (if you measured correctly).  When you start working in the other direction, by the time you get to the end you can use that remaining ½ a tile to finish up the row.  This saves you time on cuts and money on wasted tile.

When I do the 2nd row, I will place my tile directly in the center of the vertical line, thus alternating the tile seams.  From there, you just keep on building up until you’re done with the wall.

3rows

6rows

9 rows

Step 7:  Start Tiling the Side Wall

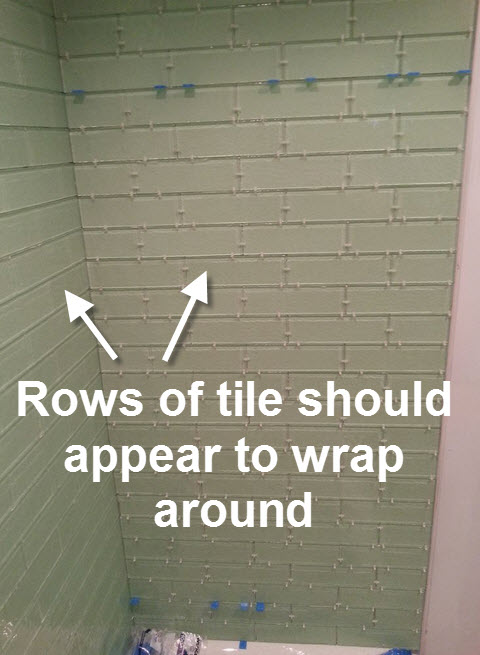
When working on the side walls, not only does the first row need to be perfectly level (just like the wall you just finished), but the tiles should appear to wrap around in a continuous line.

wrap around


Step 8:  Cleaning

Now that all of the tile has been installed and allowed time to dry, it’s time to clean between the tiles so the grout can fill those holes.

Mortar is a very hard substance when it dries, so to clean between the tile lines you may need to use an X-acto knife.  I also used 0000 steel wool to clean the mortar off the glass without scratching it.

all

 Step 9:  Grouting

You mix your grout in a similar way as you did with the mortar.  Once it’s ready to be installed, you use your grout float to spread the grout between the lines of the tile at an angle.  You work your way down the tile, making sure to fill every crevasse.   Once you’re done with the initial installation, you let it dry for about 20 minutes and then scrub the excess off with a sponge.

wipe

wipe2

After cleaning the excess grout off with a damp sponge you may be left with a light film on the surface of the tile.  This film can be easily wiped away with a damp sponge.

hazy

hazy2

Step 10:  Polish

Once you’ve cleaned the grout film off, you’re left with this beautiful final product!  It may take awhile to get here, but it’s well worth the time and energy!

final2

final3

final1


finish2


What has it been?  1 month?  2 months?  Point being, I have been severely shirking my duties of keeping you, my valued audience, up to date on the In Law unit project.  For this, I apologize, and, I intend to make it up to you in this very exciting post!

As a child, one of my favorite past times was to draw up the full architectural layout of my future home\s (along with the occasional amusement park).   In most cases, the home would include a fully equipped stable where I would have direct access to my horse from my bedroom.  I mean, how else would I be able to swiftly swing into action as the horse riding superhero that I was?  In other cases the home was actually a multi-level medieval castle with a large room where my pet dragon could spread her wings and fly around.  Of course this room would be separated from the stable so the dragon and horse wouldn’t get jealous of one another.

dragon

The best part of the home design process was getting to imagine how these spaces would be decorated.  For the dragon room, of course I would go with an open concept design, primarily built out of stone (which is naturally fire resistant).  The stable, on the other hand, would embody more of a farm-house aesthetic (with the exception of the super-modern secret room where our superhero uniforms and gadgets would be stored for safe keeping.  Also, by “our superhero uniforms,” I, of course, mean my uniform and my horse’s uniform).

Now, that I’m a grown up I get to relive those childhood past times.  This time, however, after conceptualizing a space I actually get make it real.  With the In Law unit, I’ve finally achieved the point in which construction is essentially over and now I get to play around with decorating & design.

Over the last couple months, which you might remember as “that chunk of time where Beth didn’t update her blog,” I’ve been working to tie up a few loose ends in the In Law unit.  For starters, I’ve painted the walls to the main room.

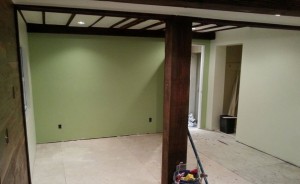
Since the space is somewhat small, we decided to go with a light beige color to keep the room feeling open, with a green accent wall for a pop of color.

walls

room

Once all of the walls & ceiling were fully painted, I moved onto putting up the ceiling molding.  You see, the exposed joists gave me the rustic look I was going for, however, they didn’t look particularly tidy. 

pre-molding.joists

The drywall didn’t terminate in a clean way against the joists, and there was drywall putty splattered on the wood.  This goes against all of my OCD (or as I like to call it, attention to detail) qualities, and had to be fixed!  To remedy this situation, I installed molding between all of the drywall and joists. 

Now, you might be thinking “Beth, installing molding sounds easy enough.  Why haven’t we heard from you in months?”  Well, blog reader, that is an excellent question.  You see, putting up molding is a multi-stage process.

First, you need to measure, select and purchase the molding.

molding1

Then you need to paint everything.

molding2

molding3

Then you need to measure and cut the molding to size, and at the correct angle.  Keep in mind that nothing about the In Law unit is square.  As I like to tell people, 45 degree angles are for children.  Around here, we like our angles inconsistent and unconventional.

Once the molding is nailed to the ceiling,  you spread caulking between the molding & the drywall to make it look nice & clean.

caulking

Now, let me take a moment to get serious.  Here goes…feel free to write this down.  Caulking is the magic that hides all of those finishing flaws you have.  Poorly cut angles, goop them up with caulking.  Nail holes, fill those with caulking.  It’s the kind of magic you can get for $2.00 at the local hardware store, and you get to avoid having to eat your way out of a cookie house to escape an evil witch!  

caulking

Lastly, you do some touch up painting and voila!  You’re all done!

post-molding.joists

ceiling

The next steps are to install the tile and the flooring!!  I can’t wait.   I’ve already started testing stains for the flooring and will be looking into tile this week.  Stay tuned.

Hi Everyone!  Wow, it feels like it’s been months since I posted to Building With Beth!  You see, renovating a home is not entirely unlike going to the gym.  At first you’re all fired up and ready to prove your mastery of gravity against those weight machines.  After working hard for a while, however, sometimes you simply hit a plateau, making it harder to keep up the routine.

In the case of my home renovation project, I can say that I literally hit a wall!  Well, maybe “hit” is too strong a word.  I sanded a wall, over & over & over!  That’s right, it’s drywall time!

Not long after finishing up the process of spray foaming and insulating the walls, I had a friend of a friend come in and install the drywall.  Now, I know what you’re thinking, “Beth, I thought this was a DIY’er blog, why didn’t you install the drywall yourself?”  Well, blog reader, that’s a fair question.  I will outline my thinking in the following list of mathematical equations:

  1. Me + Maneuvering Heavy Drywall Sheets = Trip To Emergency Room
  2. Me + Complicated Precision Drywall Cuts = Drywall With A Lot of Misplaced Holes
  3. Me + Balancing on Ladder + Overhead Installation of Drywall sheets = Trip To Emergency Room
  4. Me + Full Time Job + Large Drywall Project = Many Many Months Without Drywall

In the end, the decision was made mostly based on my desire to have a nice looking space before 2014. They guys came in and knocked out the entire drywall installation in a single day!  Watching them work was like watching a well-oiled machine.  Together, these three guys effortlessly maneuvered those sheets of drywall into place like it was second nature.  In the end the transformation was pretty amazing:

dingo

dingo2

joists

shower

Of course, after their work was done my work began.  Picture Ralph Macchio in the Karate Kid as a 6’2” tall female DIY’er sanding a wall rather than waxing a car.

The drywall finishing process is the main reason why you haven’t seen a post from me in awhile.  What took three guys one day to install, took me nearly two months to finish.  With that said, the feeling of pure satisfaction when it was all done made the whole process feel worth it!  AND, now the walls are ready for primer!

Walls WIth Primer

walls1

wall2

Now, with the room all ready for paint, it is time to focus my attention on the various wooden accents in the room.

A while back I tested the paint on the column and beam that is the center of the room.  Unfortunately, it came back positing for lead.  Since I want to keep the rustic feel of the exposed, well-aged wood, I decided to wrap the column & beam in some reclaimed barn wood I got at the local lumber yard.  I like to think of it as putting a nice warm coat on the old bones of this house.  Once the reclaimed wood was put in place, I stained the lighter wood to match the dark color of the older wood in the room.

Before Pictures

lead

reclaimed1

After Pictures

coat

Now, you might recall in my Whats Next post awhile back I mentioned picking up a couple of boxes of beautiful walnut flooring at the local salvage yard.

walnut

Now that the drywall is up it’s time to make it look pretty.  I didn’t have much walnut to work with, but I had enough for an accent wall behind where we will be mounting the television.

wall-walnut

Using my trusty finishing nailer and some construction adhesive I staggered the boards down the wall.

walnut1

walnut2

Between the drywall, the walnut accent wall and the beams wrapped in reclaimed wood, this former barn-like space is starting to really look like a warm and cozy room!

After Pictures

Final

classy

I still need to sand the walnut so it’s smooth and cover it in a protective finish, but this accent wall is already classing things up!

Phew!  I covered a lot in this post, but stay tuned for more on finishing this In Law unit!  Things are coming together.

Now that I’m officially an adult,  I occasionally find it challenging to feel that youthful unrestrained exuberance in the little things like I once did.  At my ripe old age of 37 you probably wont catch me popping wheelies on my BMX or blowing bubbles in my milk.  With that said, there’s always room for exceptions.  Take whipped cream for example.  Iyou stick a whipped cream container in my hand you could bet money that the next thing you’ll see is my mouth so full of whipped cream that its oozing out my nose.  That’s right.  When it comes to whipped cream, go big or go home!

Now you might be wondering what whipped cream has to do with home renovation.  You see, I’m at that point in my project where the dry rot has been repaired, the windows have been installed, the wiring is in place and the plumbing is ready for some flushing!  Therefore, there is only one step left before drywall can be installed.

That’s right, it’s time to spray foam!

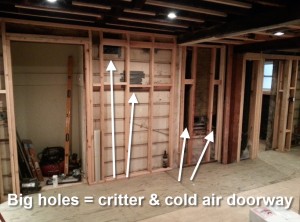
As many of know, the walls in the In Law unit are not resistant to bugs, critters, bandits, cold air or moisture.  Frankly, it’s almost like your camping but without the warmth and security of a tent.  You can actually see my neighbors back yard through some of the spaces between the siding.

backyard

After doing my DIY research, I have decided to insulate the In Law unit using closed cell spray foam.  I mean, think about it.  This spray foam keeps bugs out, keeps critters out, keeps moisture out, keeps warm air in, AND it looks just like whipped cream!  The choice was a no brainer.  I’ve actually been giddily awaiting this moment since this renovation project began!  I get to fill my walls with whipped cream a whipped cream like substance!  It’s like a dream come true.

Plus, I get to wear this stylish and functional body suit.  Between the giant canister of whipped cream foam, the body suit and the risk of the unknown, it’s almost like I’ve walked into a 1980’s rave!

dance4

I decided to go with the “Foam It Green” DIY spray foam kit.  Based on the reviews and videos, this product seemed like the best choice and the easiest to use.  

sprayfoam

Beyond all of the benefits that I’ve already mentioned, this spray foam also hardens really fast and acts as an additional structural support.  Frankly, with so many different functions, there’s a side of me that wants to see how far this product will go.  

Could I cover myself in spray foam and then float gingerly down a river?  Or, better yet, could cover my entire car in spray foam and turn it into a boat-car?  I see endless possibilities for experimentation, but I need to stay focused on the task at hand!

sprayfoam2

Disclaimer:  Now there is something worth mentioning regarding spray foam that doesn’t seem to be very well covered on any websites.  Despite the fact that the foam looks like a lovely blending of whipped cream and sea-foam, you do not want to eat it, breathe it, or get it on your body in any way.  The point of spray foam is to expand and plug holes so air cannot get through.  If you think about it, this is the opposite purpose of your lungs.  If you do not want to create an air and moisture barrier inside your body, make sure to ware the respirator at all times.

From a topical standpoint, this stuff sticks and does not come off easily.  Frankly, if I got this in my hair I might do one of two things.  I’d either shave my head, or I’d cover my head entirely in spray foam and pretend its a hat.

This is why I’m covered from head to toe in the Foam It Green suite.

glove

Now that I’m geared up, I’m ready to get this party started!  The plan is to try to focus first on the external facing walls.

Check out my film debut below where I show installation process in fast forward!

I was shocked, but the 600 square feet of foam that I purchased actually ended up covering every wall of the In Law unit.  The spraying was actually really easy.  If you were to use this product I’d offer two pieces of advice.

1)  Change the mixing nozzle on the spray gun frequently.  They give you a ton of nozzle “mixing” heads because they get clogged when you stop spraying, so you should change them out regularly.

2)  I found that starting from the bottom of the wall and working up worked best for me.  Sometimes when I went top-down, the foam would have a hard time sticking and would drip to the ground.  When I went bottom-up, the foam sort of stuck to itself and made things much easier.

Check out the Before and After pictures below.

BEFORE:

before1

AFTER:

after1

BEFORE:

before2

AFTER:

after2

BEFORE:

before3

AFTER:

after3

With every wall insulated, it’s time to move onto drywall!  This is a huge step for this project and I can’t wait to share it with you all!  Stay tuned.

I’ve come to the conclusion that renovating a space is not entirely unlike creating a Frankensteinian monster.  Don’t get me wrong, I don’t expect our In Law unit to terrorize the village locals; nor do I expect it to require a jolt of lightening before I can call this project complete.  With that said, there are some similarities that should not go unappreciated.

If you think of renovating as being a series of phases, we begin with the demolition phase.  From a Frankenstein standpoint, this might include digging up bodies and harvesting the good parts and chucking the bad parts.  “Oh..that legs is missing a foot, let’s go ahead and scratch that.  Onto the next body.”  From a building standpoint, you open up the walls and identify the rotten wood, or broken pipes.  Then you try to identify the parts of the space you plan on keeping.

compare1

Then you’re onto phase two, “repair.”  Now if I was a mad scientist, this is when I’d start opening things up and shoving things into place.  A kidney here, a femur there, etc.  As more of a mad-DIY’er than a mad-scientist, in this phase I prefer to put a floor in here and a wall in there.

sanitary

Now, we’re onto the last phase, the “finishing” phase.  This would be when I (the mad scientist side of me) might stitch up the holes, put on the little neck bolts, hook my beast up to a lightning pole and hope for the best.  This would understandably be the most anxiety producing phase of the project.  Questions, that I might not want to know the answer to would go flying through my head, such as… “Will my monster eat children?  Will he chase screaming farmers off their land making it that much harder to find organic vegetables in the village?”

Now, as a DIY’er, this is the phase that has the highest level of instant gratification.  This is when the work space magically transforms and reflects its own personality and character (more like a butterfly than a crazed zombie beast).

finishing

This, my DIY following friends, is the phase I’m after!!  This is the prize I have my eye on!

The “Finishing” phase is right around the corner!  I am officially in the final throes of the “Repair” phase and after a few stitches supports here and a new kidney electrical outlet there, I’ll finally get to move onto the finishing phase!  (and don’t think I won’t yell “IT’S ALIVE!” when this is all over).

Here’s the list of everything that needs to be done before I can put up drywall.

  1. Raise the closet floor
  2. Add support where the wall mounted TV will be installed
  3. Add support where the sliding door tracks will be installed
  4. Stain the joists
  5. Insulate the walls
  6. Install the tub
  7. Add electrical outlet in the kitchen

So far I’ve knocked 4 items off my list.  Here’s the summary:

The Closet Floor:

Now that all of you blog readers are well versed in the art that is installing a floor, I will spare you the details of what it took to raise the closet floor.  Instead, I’ll show the summary in picture form:

closet1

As you can see in the picture above, there is a significant drop off from the main floor of the room to the closet floor.  While this didn’t bother me for a long time, when someone asked me about it the other day I decided that it would make more sense to bring it up to the height of the floor.

closet2 closet3

closetfloor

Unfortunately, the floor is about 1/2″ higher than the main room, but that may be able to be fixed when I put the new finished floor in.  At least you won’t break your leg when trying to get a shirt out of the closet.  It’s a…step…in the right direction. Get it? “Step” in the right direction.

Okay, moving on.

Support for Wall Mounted TV:

Here I just added a couple 2×4’s to the wall to give me something solid for the future attachment of the wall mounted TV arm.

BEFORE:

tv

AFTER:

tv2

Support For Sliding Door Tracks

As you know we will have two wall-mounted sliding ‘barn’ doors in this room.  One door will be for the closet and the other will be for the bathroom.  Both of these sliding door tracks will be holding anywhere from 75lbs to 200lbs, depending on what type of door I decide to buy or build.  These tracks will require a lot of support to carry that weight.

Here are the new supports for these doors:

Barn Style Sliding Closet Door:

BEFORE:

track2

AFTER

newdoor

Bathroom Door

The bathroom door will also be on a wall mounted track, although this one will be a little smaller to fit in the limited space.

bathroom1

AFTER:

bathroom2

Stain The Joists:

As you may recall, I intend to drywall between the ceiling joists so that about 2″ of wood remains exposed.  Since half of the room has beautiful old (original) Douglas Fir ceiling joists, and the other half of the room has new construction Douglas Fir, there is a noticeable difference between the colors of the two types of wood.  The old wood is dark and rich like a freshly brewed cup of coffee, while the new wood is bright and golden like the afternoon sunshine.

stain2

To create some degree of continuity, I decided to stain the new wood to get it to a closer color match with the old wood.  Unfortunately, trying to reflect the difference in photographs is quite hard.  The main beam, however, is big enough that you can see the difference in color.  Check it out…

BEFORE:

stain1

AFTER:

beam

stain3

With that work done, all I need to do is get the electrical to install one more outlet, get the plumber to set the tub and I’m on to insulating the walls and putting up drywall.  Then things will get really exciting!

You may have noticed that I haven’t posted much to the blog over the last couple weeks.  Between summertime fun interrupting my usual working weekends and high levels of procrastination I have mostly been tackling smaller projects.  These projects, in themselves, don’t really warrant their own blog posts, however, much like Voltron, when they come together they add up to something much greater.

(For those of you unfamiliar with Voltron, let me both enlighten you and date myself)

Now, as much as I’d love to continue to watch robotic lions form a giant space robot and protect the universe from the evil forces of planet doom, we should really focus on the task at hand.  (NOTE:  this is exactly the type of procrastination I’ve been fighting over the last couple weeks).

Channeling my inner project manager, I decided that rather than bore you with a lot of short posts about small tasks, I’d streamline my approach.   Therefore, I’ve combined a couple of my most recent In Law unit accomplishments into this singular blog post.

The Bathroom Floor:

First, let’s begin with the bathroom floor.  While I know we’ve talked about this floor many times on this blog, the fact remains that despite the jack-hammering, digging, plumbing, and concrete pouring I am still left with a dramatically uneven floor.   Unfortunately, as long as the bathroom floor stays in this uneven state I can’t progress with any of the remaining bathroom renovations.

ant

While I waited patiently for a beautifully level surface to magically grow out of the uneven concrete block that was my bathroom floor, eventually I came to the conclusion that it was up to me to get this floor finished.  This meant that I was going to need to navigate through some of the residual trauma I was holding onto after my last encounter with concrete.

You see, I found that my relationship with concrete was very one-sided.  Not only did it feel like I was the one doing all the work, but every time I’d come home with a new bag of cement it wasn’t enough.  I would estimate 7 bags of concrete and 14 bags later I was still left needing more.  While I wasn’t looking forward to rekindling this relationship, I decided that this time I wasn’t going to settle.  Rather than buying the estimated 3 bags, I bought 6!

“That’s right! Concrete!  Either meet my needs or we’re through!”

With my six bags, my bucket, my hose and my drill, together we set out to try to fix the ugliness that had become the bathroom floor.

concrete

mixing

pour1

pour2

pour 3

pour4

With a flat and level surface in place, I was able to begin building the subfloor.  Because the bathroom ceiling is lower than the ceiling in the main room, I couldn’t build the subfloor very high.  For this reason, rather than laying the two by fours on end, I instead placed them flat on the ground.  This would allow me to build the subfloor without making the room feel like a cave.

floor1

From there I added some additional two by fours between the “floor joists” for some additional support.

floor2

With the ‘floor joists’ and additional support pieces in place I was finally able lay the pressure treated plywood on top.

bathroom

bathroom2

Finally, after all that work the bathroom floor was done!  This last experience with concrete was not nearly as tough as the first experience.  I credit the shift to both my increased familiarity with the product, and also with the fact that I was working with concrete’s much more flexible and attractive sister, self leveling floor resurfacer.

With the bathroom floor completed, it was on to the next task.

The Bathroom Door:

You see, I got into a bit of a pickle when it came to the bathroom door.  It turns out that the standard door height is 80.”  While this may seem like a somewhat insignificant fact, when I raised the In Law unit floor I also shrunk the bathroom door opening to 78.”  Oh well, these things happen.  Now it’s just about figuring out a solution so our future guests can have the private poop they so desire.

While I could cut the door down to 78″ that wouldn’t change the fact that there is a step down when entering the bathroom.  This means the door would only be able to open into the bathroom, making the already small space that much smaller.  Another alternative would be to install a pocket door, but the plumbing on either side of the door opening made this option only possible if I moved the plumbing around.  Since this is not an expense I am eager to accommodate, I had to consider another solution.

plumbing

After careful consideration of my options I decided to channel my inner equestrian and visualize life in a barn.  Then, like filly winning the Kentucky Derby, it came to me!  Remember these beauties?

door1

barndoor4

That’s right, we’re back to wall mounted sliding doors.   Not only will these doors continue to keep the room feeling spacious, but they will also, most importantly, help facilitate the all important private poop.

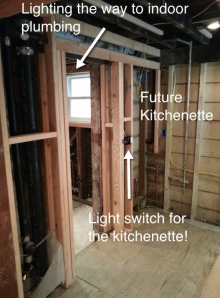
With the decision made, it was time to figure out how this door would fit into the space.  You see, the fancy new poop pipe has made it so one side of the door opening protrudes into the room further than the other side of the opening.  This means that there would be nothing for the sliding door to butt up against when it is closed.  To solve this problem I needed to build a small wall near where the kitchenette will be.

door

With my trusty new framing nailer in hand, putting up that wall was a breeze!

door

door2

Now with the door framing all figured out and the bathroom floor completed, I just need to finish up the ceiling, put in the bathtub and insulate before I can put up the drywall!  We’re getting closer to a finished rustic retreat!  Stay tuned!

Over the last couple weeks the In Law unit has really started to take shape. What was once a zombie rodent playground, littered with rotting wood and asbestos, has begun to resemble a rustic retreat.  Well, even if the room leans on the ‘rustic’ side more than on the ‘retreat’ side,  at least you don’t need to don a space suit just to walk inside.

space

While we continue to work towards the modern-barn aesthetic, we’d still like our visitors to be able to enjoy all of the conveniences of the 21st century.  Luxuries like indoor plumbing and electricity should be in lavish supply.  Unfortunately, electricity is one item that has been hard to come by in our rustic space.  While draping extension cords from the garage may work for this DIY’er, the tripping hazard liability has prompted me to pursue other, more permanent, methods of powering this space.    Now, when it comes to re-wiring and electricity, I thought it might be wise to reference my DIY Rulebook.  

Rule #1…”Don’t do anything that might cause you to die.”

Now, while you might think that this rule should be reserved for jobs like underwater bomb defuser or flaming aerial stunt woman, you really shouldn’t limit yourself to only the extreme professions.  In my case, my knowledge of electricity does not expand much further than keeping powered items away from a full bathtub.  Therefore, when it comes to re-wiring an entire space, it is time to bring in the professionals. 

Here’s where things are right now:

lamp

As you can see, we’re not exactly overflowing with lightning-like power.  Therefore, the wiring plan is as follows:

INSTALL…

  1. Recessed lighting all over
  2. New electrical outlets all over
  3. Behind the wall wiring for a wall mounted TV
  4. Some lights outside the sliding glass door.
  5. A bathroom fan and vent it outside

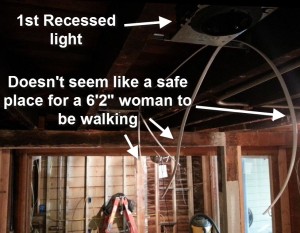
I’m very lucky in two regards (well, many more than two, but let’s stay focused!).  First, a family friend, Dave, is a great professional electrician who I completely trust;  and Second, Dave knows how to design wiring for a space.  If anyone can take this gloomy In Law unit, that is littered with ancient home-owner hacked wiring, and make it glow, Dave could do it.  So I handed over the keys and  let him get to work.

Here’s the progress:

electrical

wires2

While these wires are not being powered at this exact moment, I am still at risk of being strangled or of getting an eye poked out, so I have left this space so Dave can continue to work his magic.

After a few days of wire wrangling, here’s our newly powered up space!

BEFORE:

room.off

door.off

broom.off

AFTER!

room.on

door.on

broom.on

This light and electricity will definitely come in handy with my next project.  It’s time to focus some time on that bathroom.  Stay tuned.